
Before adding games, make sure you have valid Nintendo Switch game dumps in one of the following formats:
These files must be extracted from your own Nintendo Switch console using software such as NXDumpTool..
Note: For legal and performance reasons, always use files downloaded from your personal device.
To add games to your Ryujinx library:
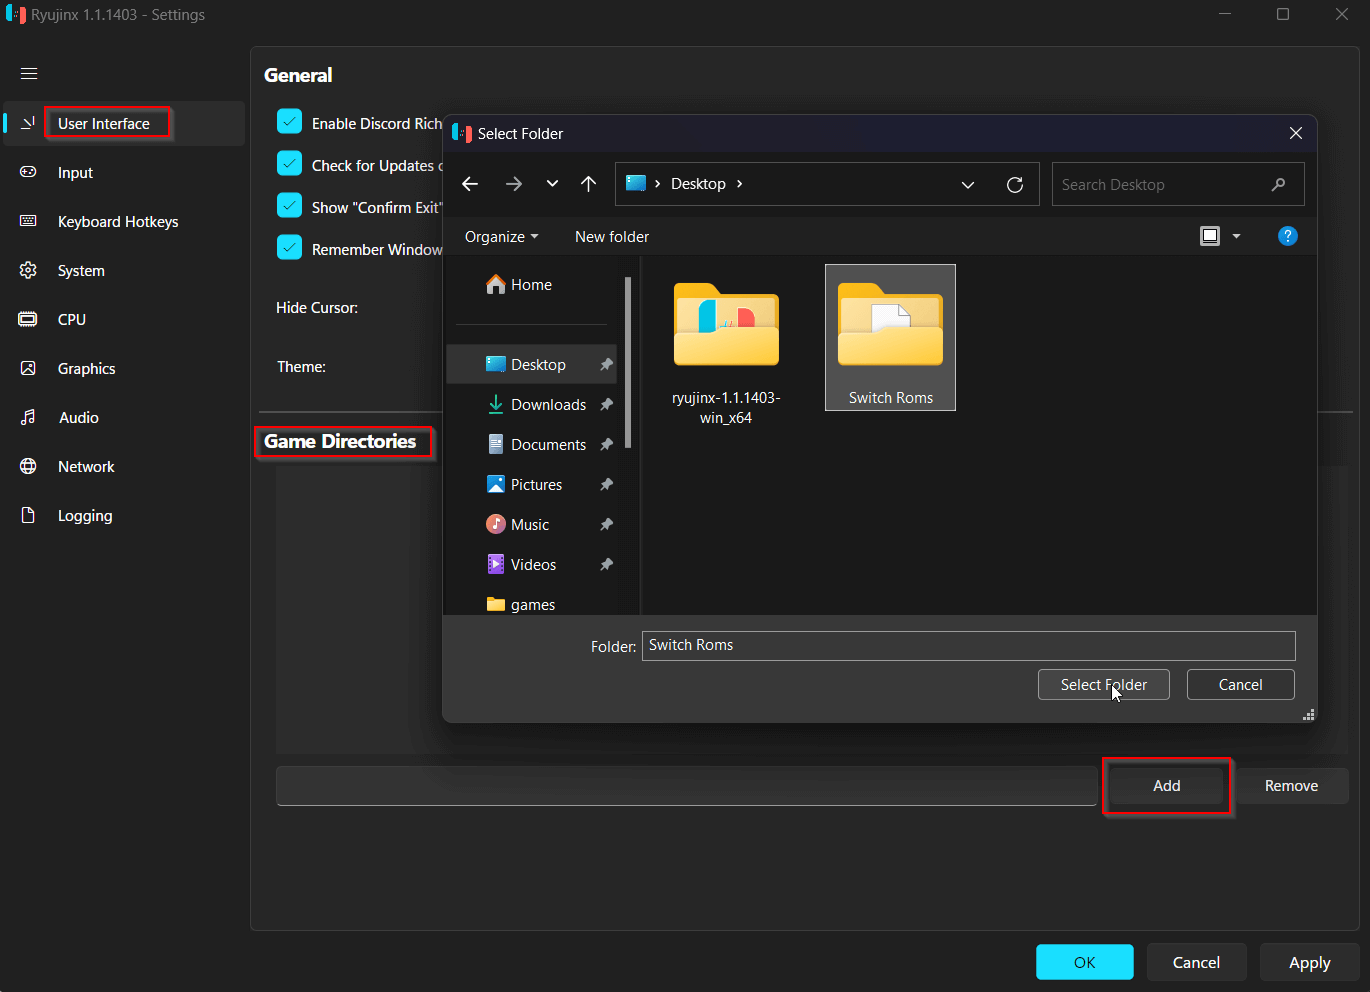

Ryujinx will scan and load all supported files from that directory. Once completed, your games will be displayed in the Ryujinx main window under the game list.
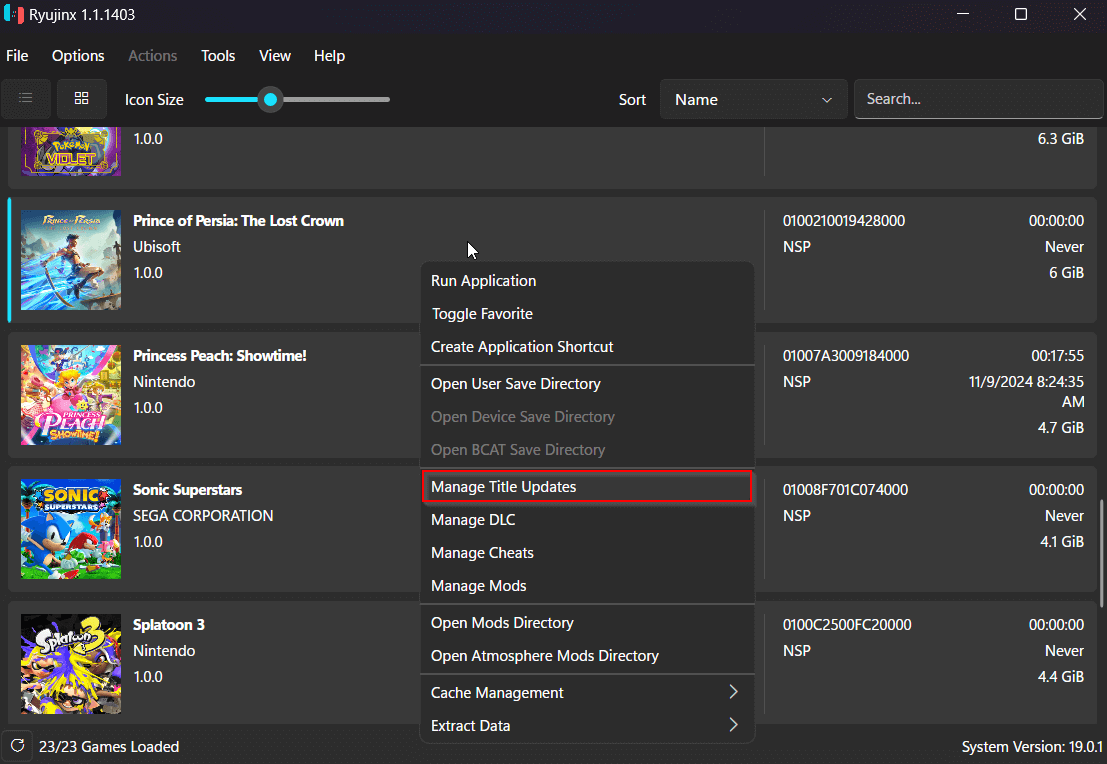
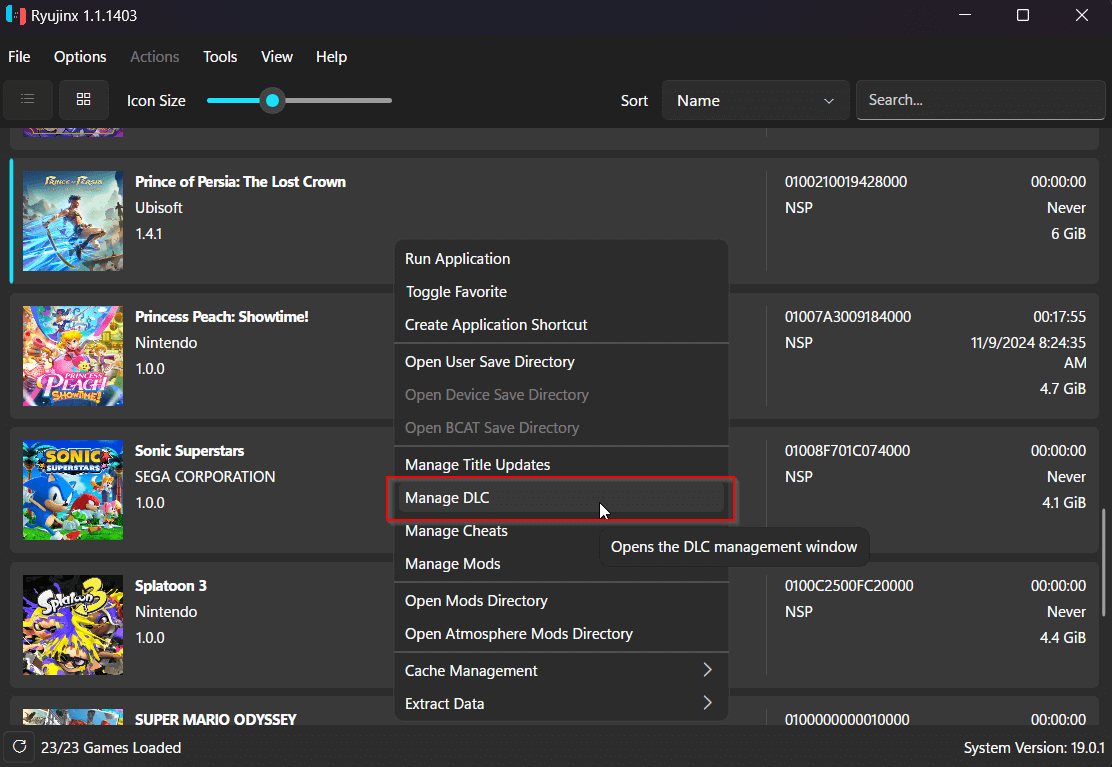
Ryujinx lets you easily install and manage title updates for your games. Updates can include new features, content, or necessary bug fixes.
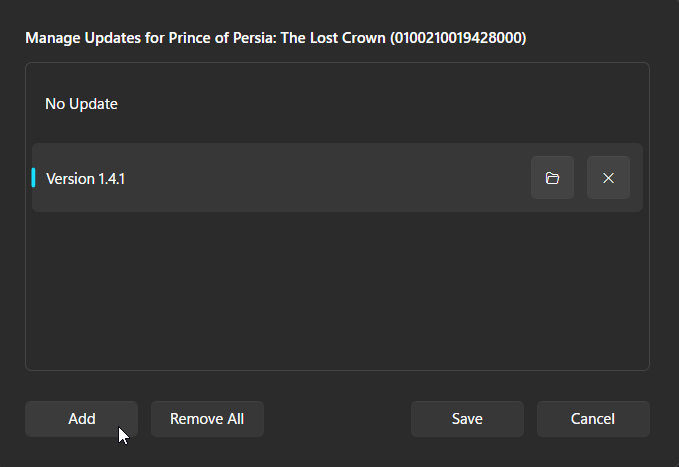
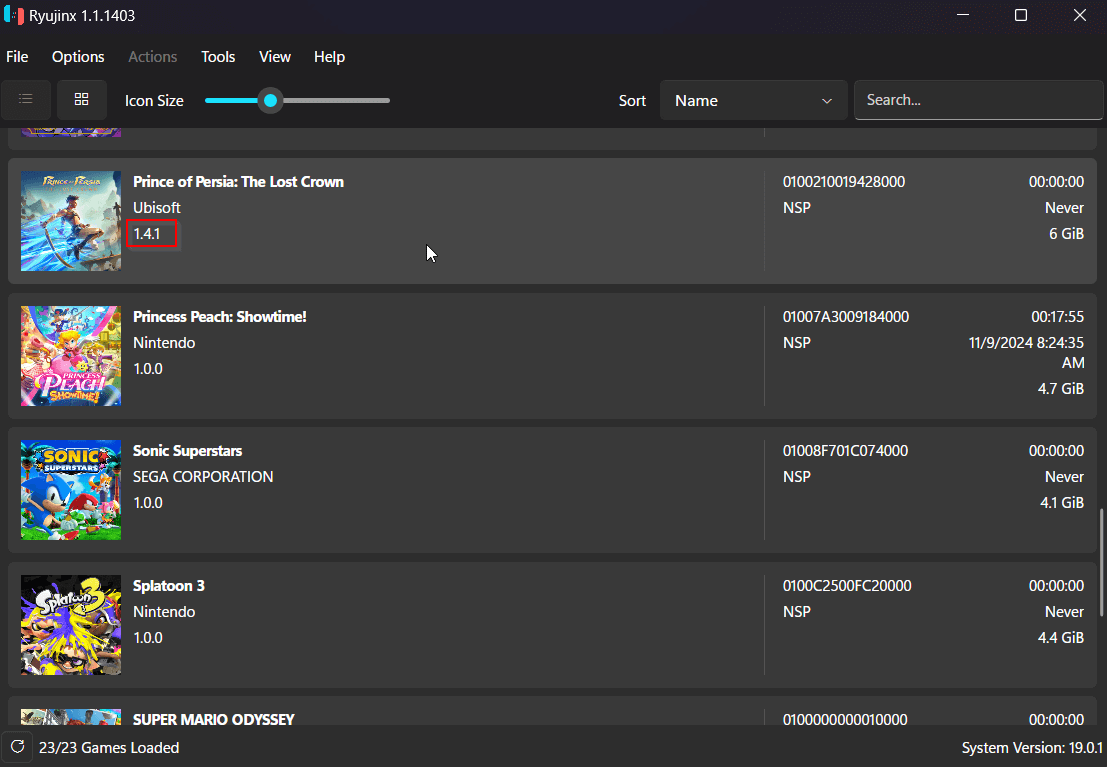
The updated version of your game will now be reflected in the list.
This built-in tool allows you to switch between update versions at any time.
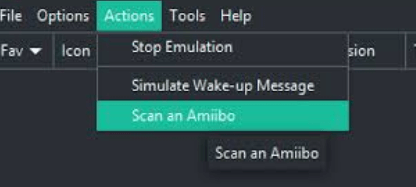
Because of changes to Ryujinx’s domain and backend, automatic Amiibo scanning is no longer available. However, manual setup is simple and effective.
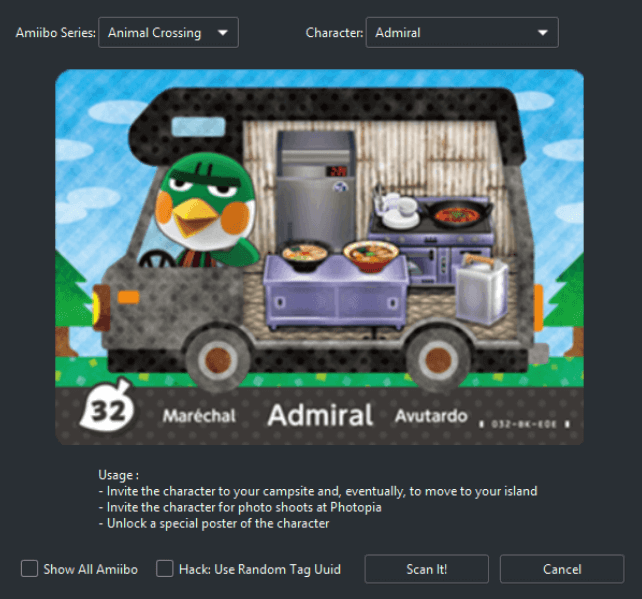
Tip: Only Amiibo compatible with your current game will be displayed by default. To see the complete list, select “Show All Amiibo.”
Previously, Ryujinx supported automatic Amiibo scanning while connected to the internet, with no files or downloads required. This feature has since been discontinued.
If you are using an old version or fork that still supports it:
Note: This method depends on deprecated services and is no longer functional on most current builds.
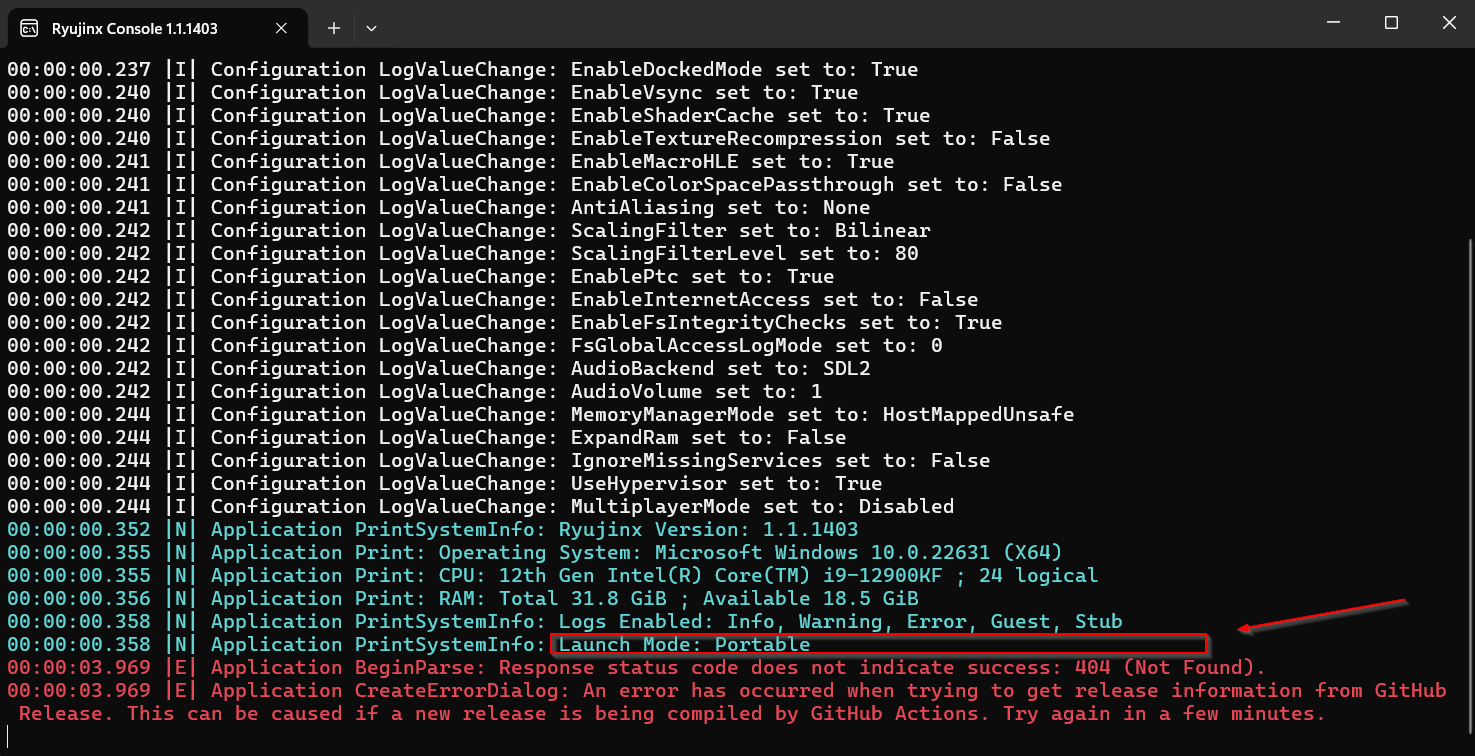
Understanding and Resolving the Ryujinx Update Error
If you receive this message while launching Ryujinx:
“Ryujinx has encountered an error. An error has occurred when trying to get release information from GitHub Release. This can be caused if a new release is being compiled by GitHub Actions. Try again in a few minutes.”
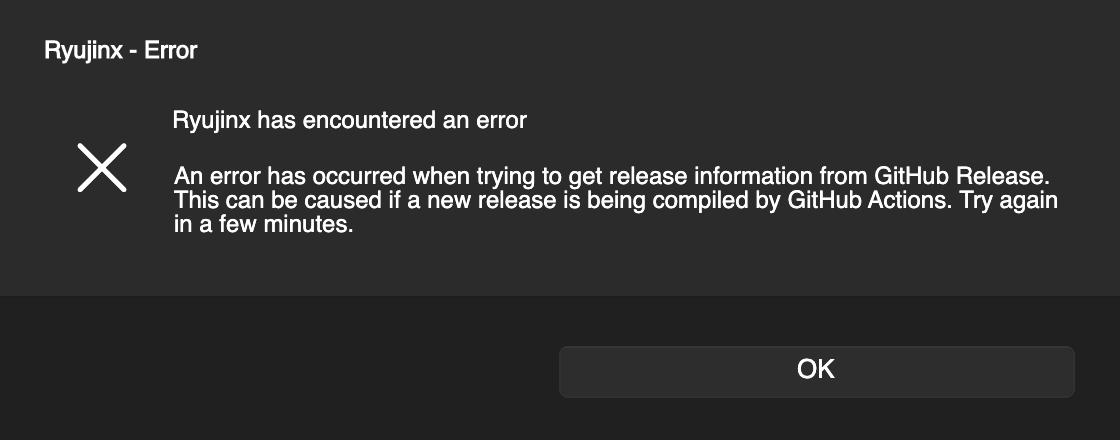
You are not alone. This problem is common and was caused by a change in Ryujinx’s update infrastructure. The cause is explained below, as well as how to fix or work around it.
What it does: Resolution scaling raises the game’s internal rendering resolution above the default. This improves image clarity and reduces pixelation, which is particularly noticeable on high-resolution displays.
Available scaling levels: 1x (native), 2x, 3x, 4x, and custom values.
How To Enable:

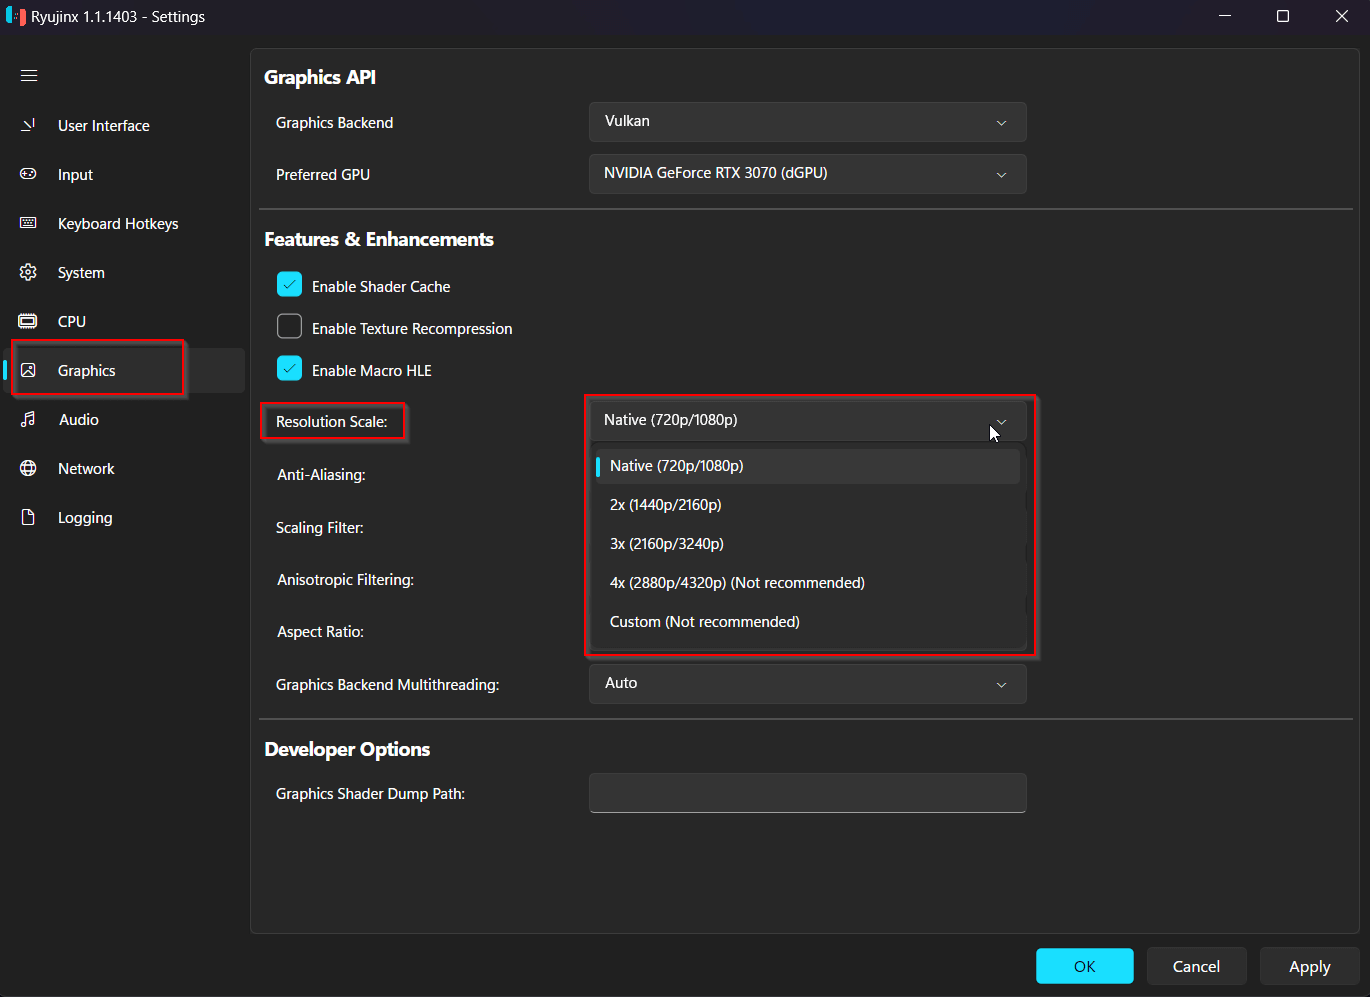
Higher scaling improves visuals, but it may have an impact on lower-end systems.
What it does: Anisotropic filtering increases the sharpness of textures when viewed from an angle. It reduces blur and increases the clarity of distant textures.
How To Enable:
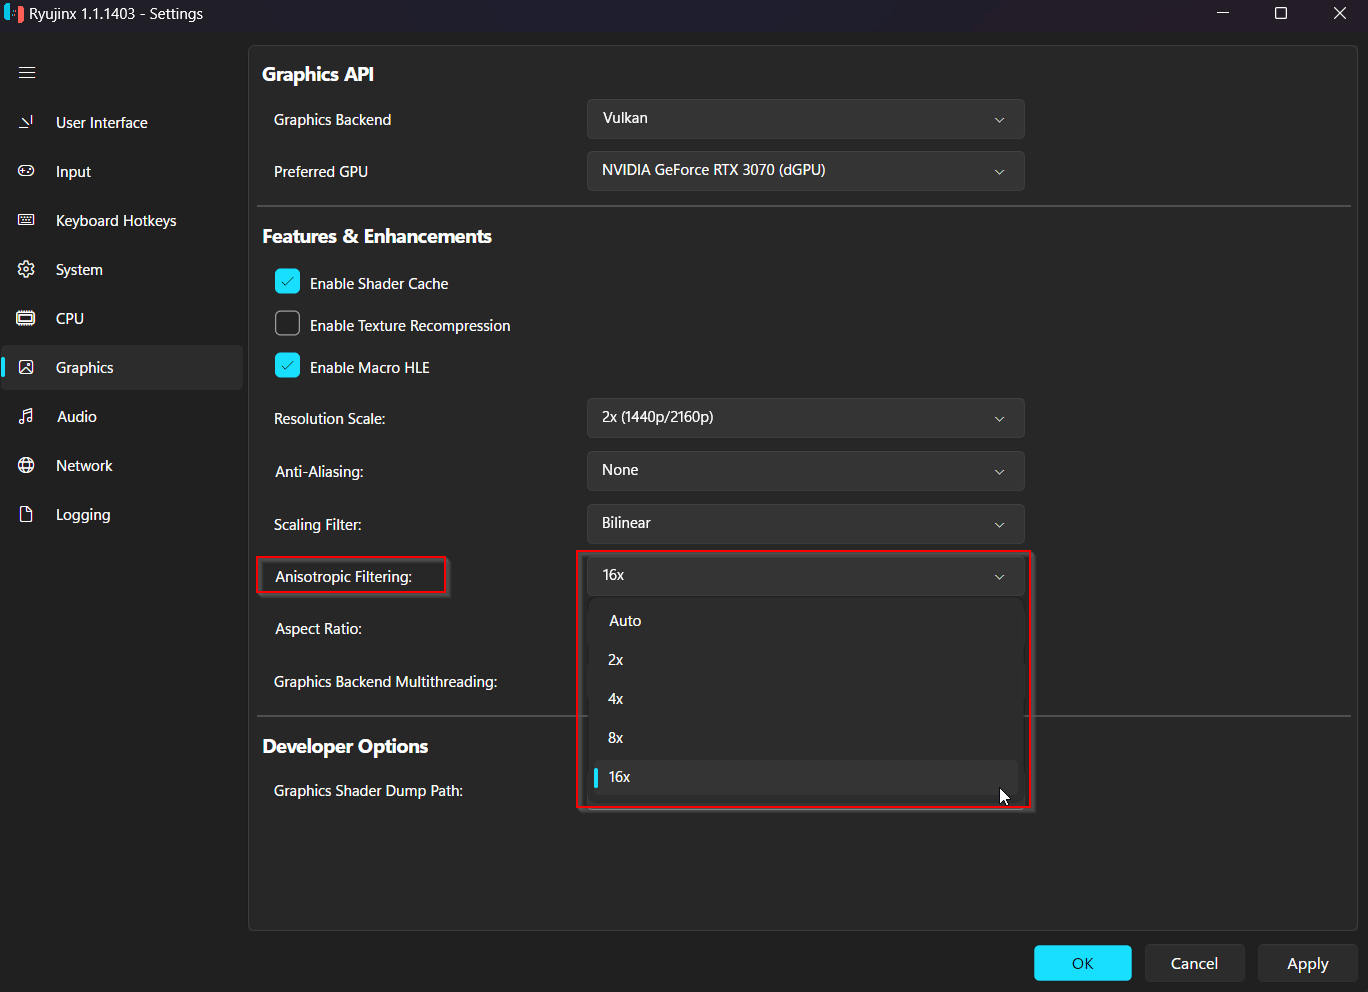
Note: This setting may cause visual glitches in some games. Adjust as needed for the title.
Shader caching stores compiled shaders to avoid stuttering and delays during gameplay. Ryujinx reuses cached shaders rather than compiling them again, resulting in significantly improved smoothness.
Key Points:
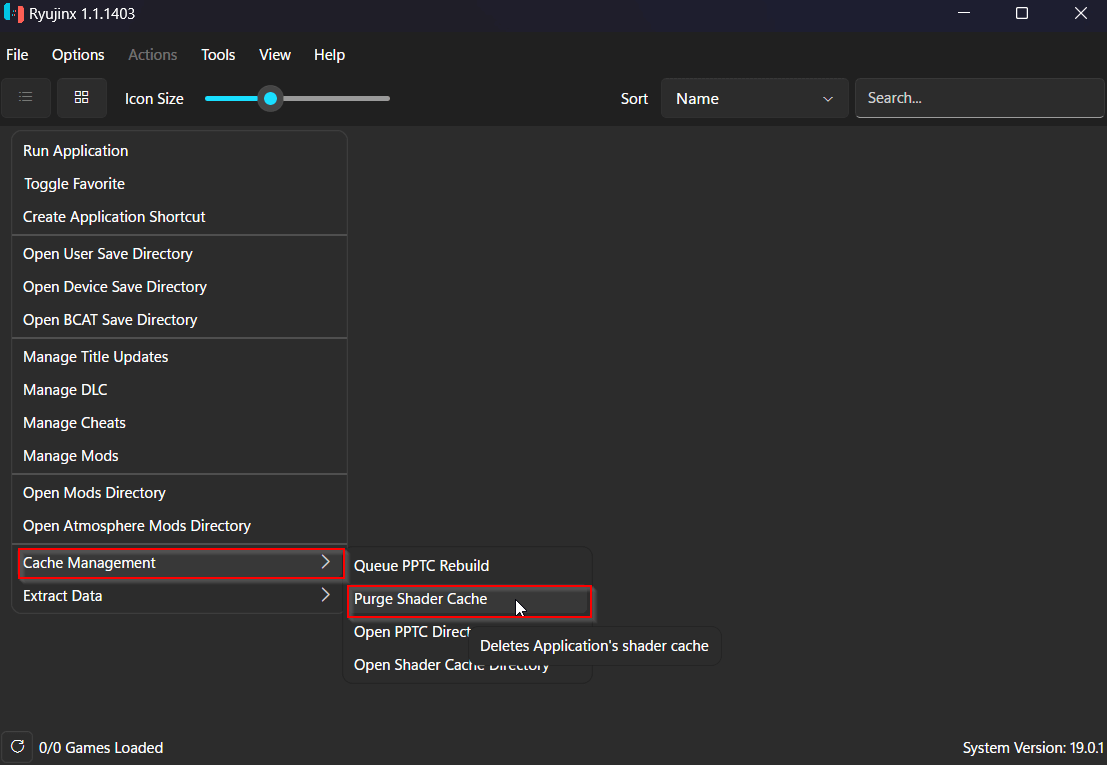
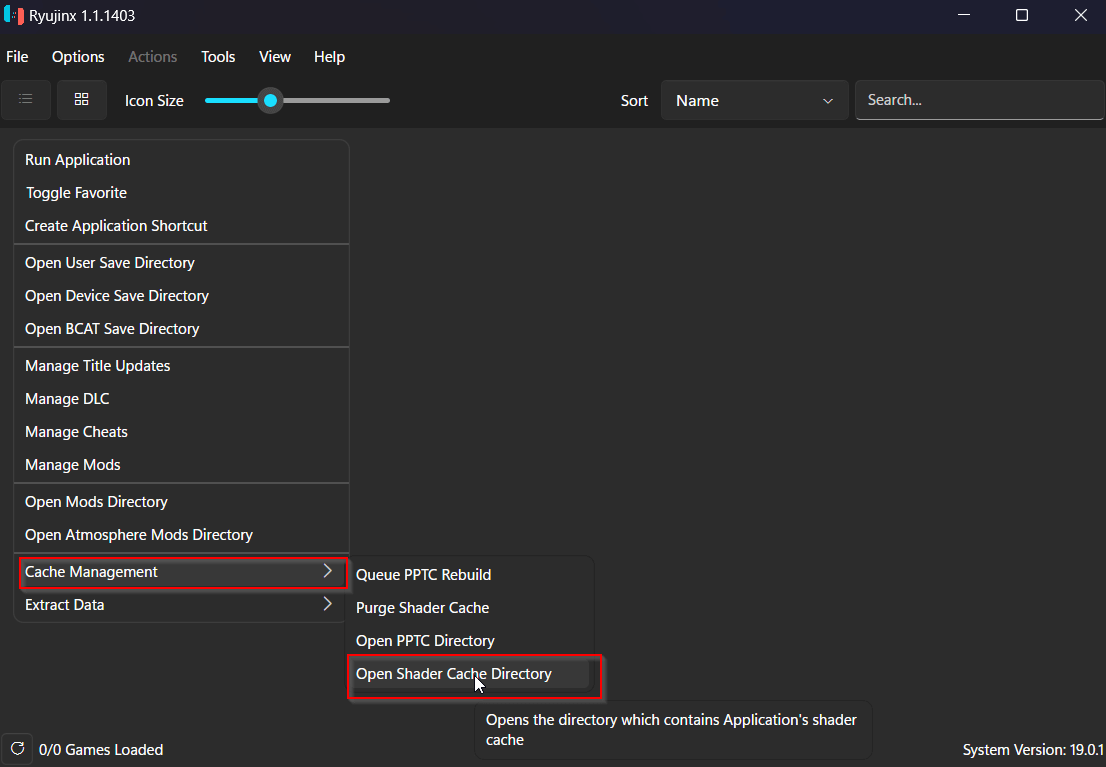
To disable the Shader Cache (not recommended):
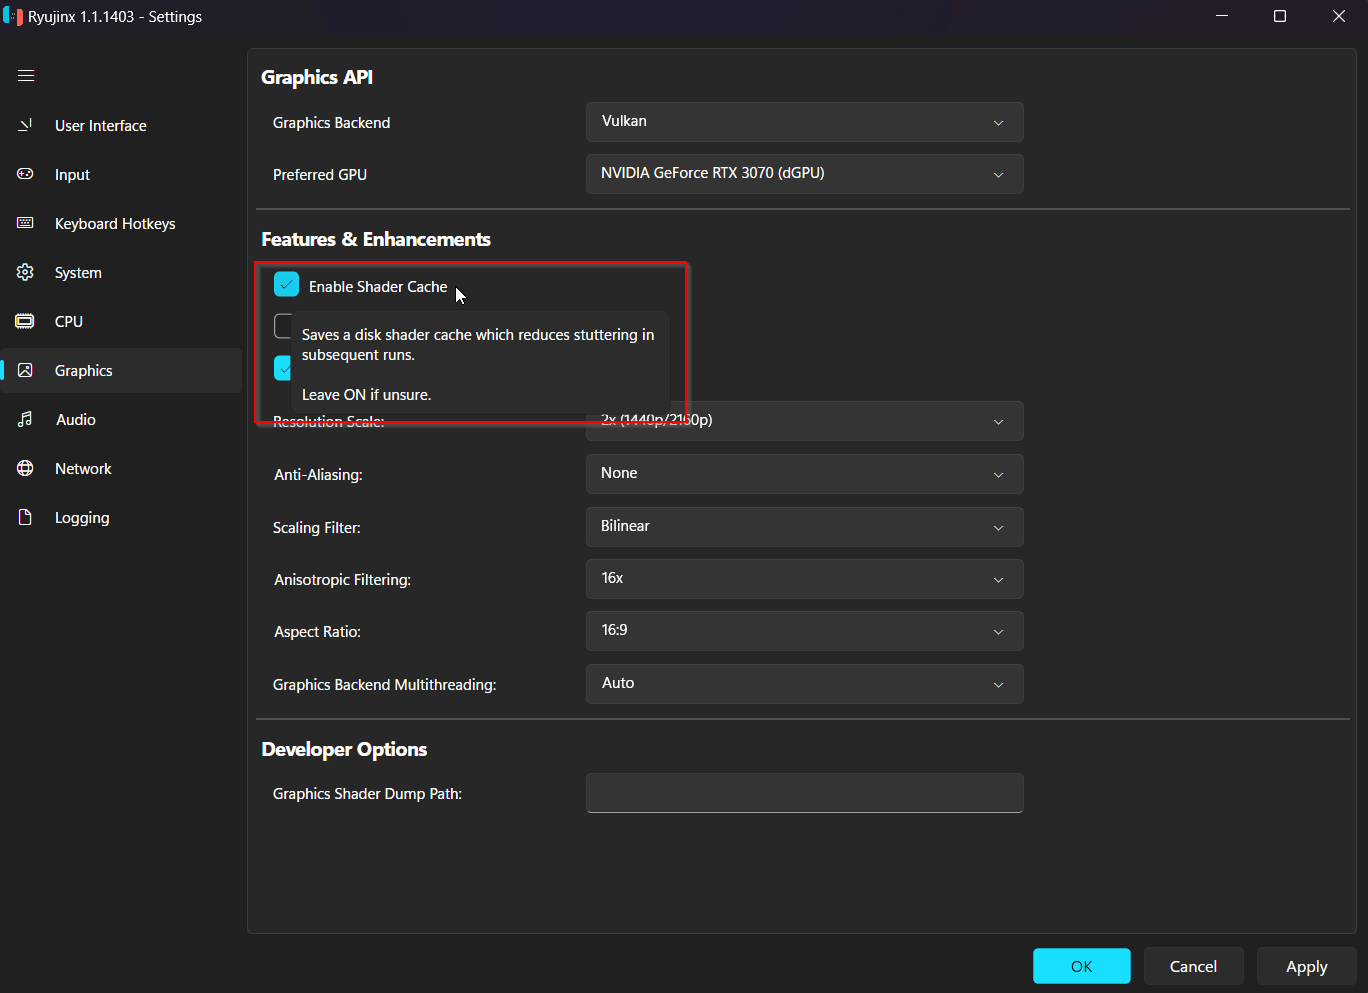
If you encounter shader-related crashes:
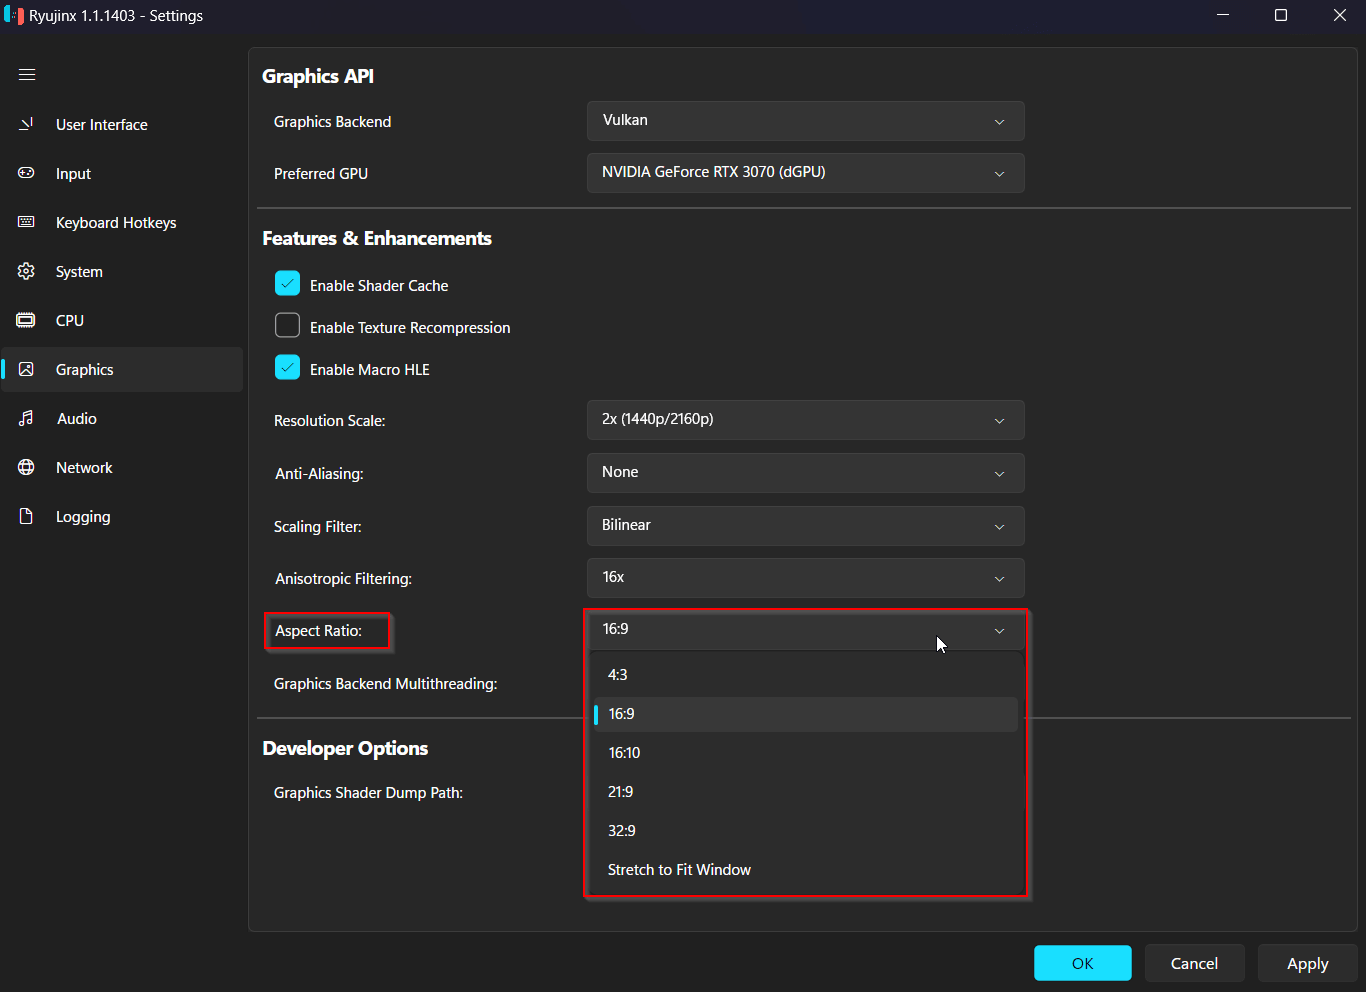
What it does: This setting lets you change the game’s display shape. Adjusting the aspect ratio ensures that the game fits perfectly on your screen, with no distortion or black bars.
Common Ratios:
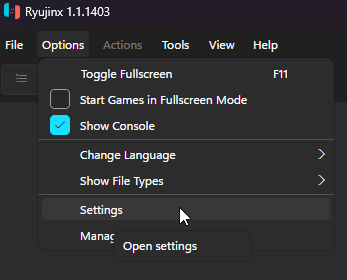
How to Change It:
Option 1:
Option 2:
![]()
Option 3:
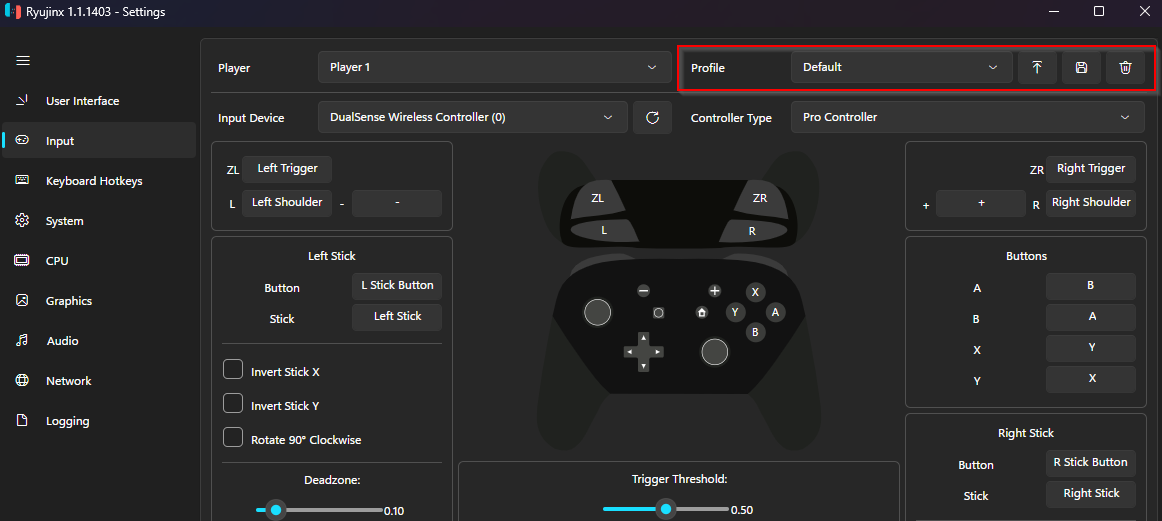
To access the input settings:

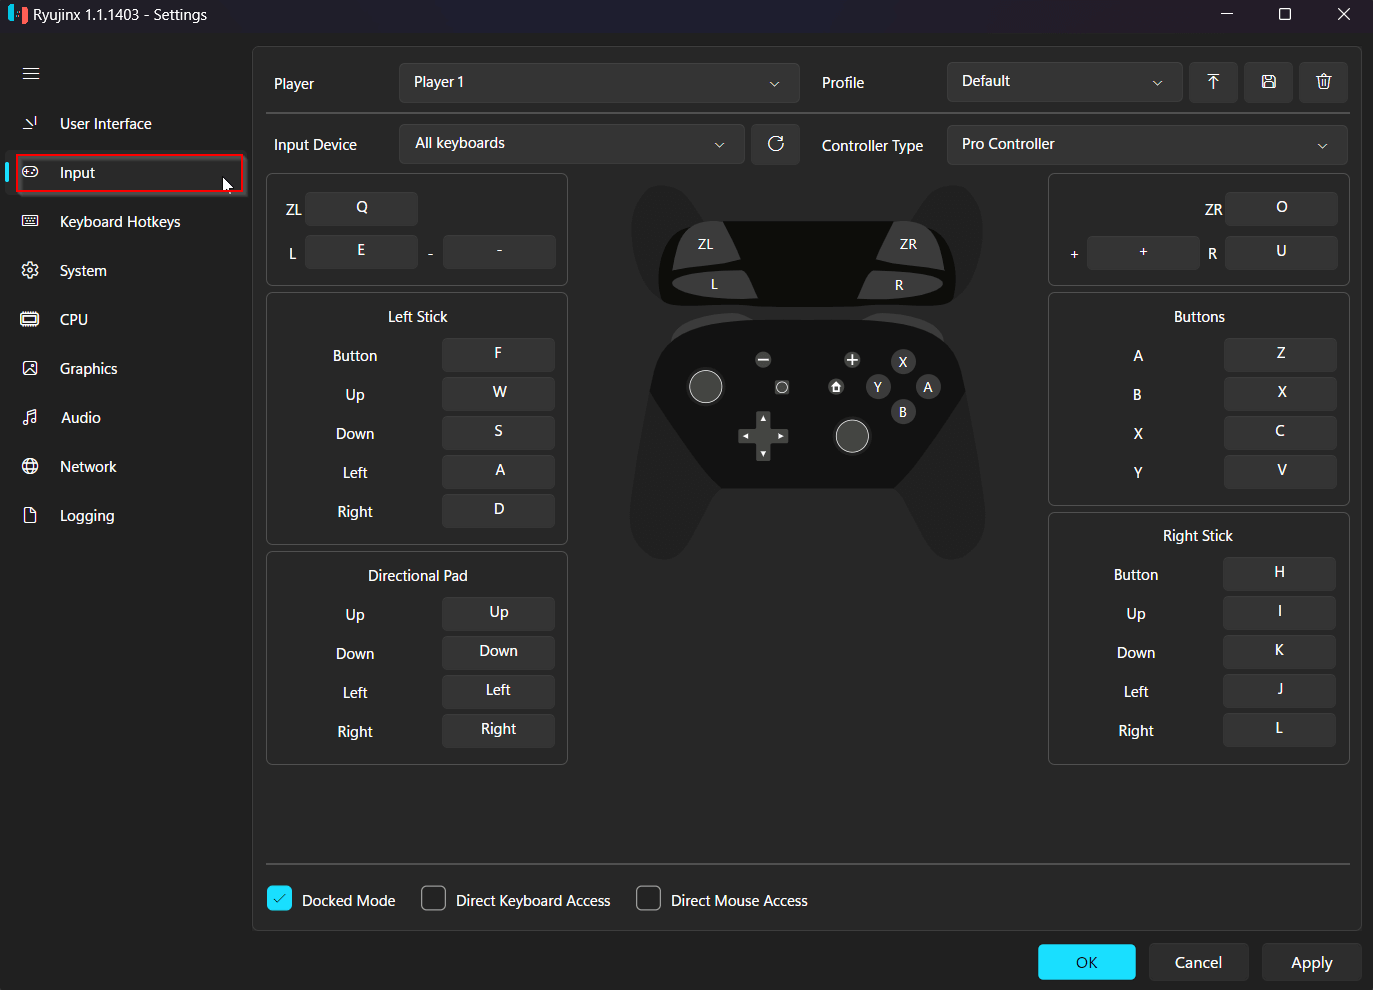
You will see two main options:
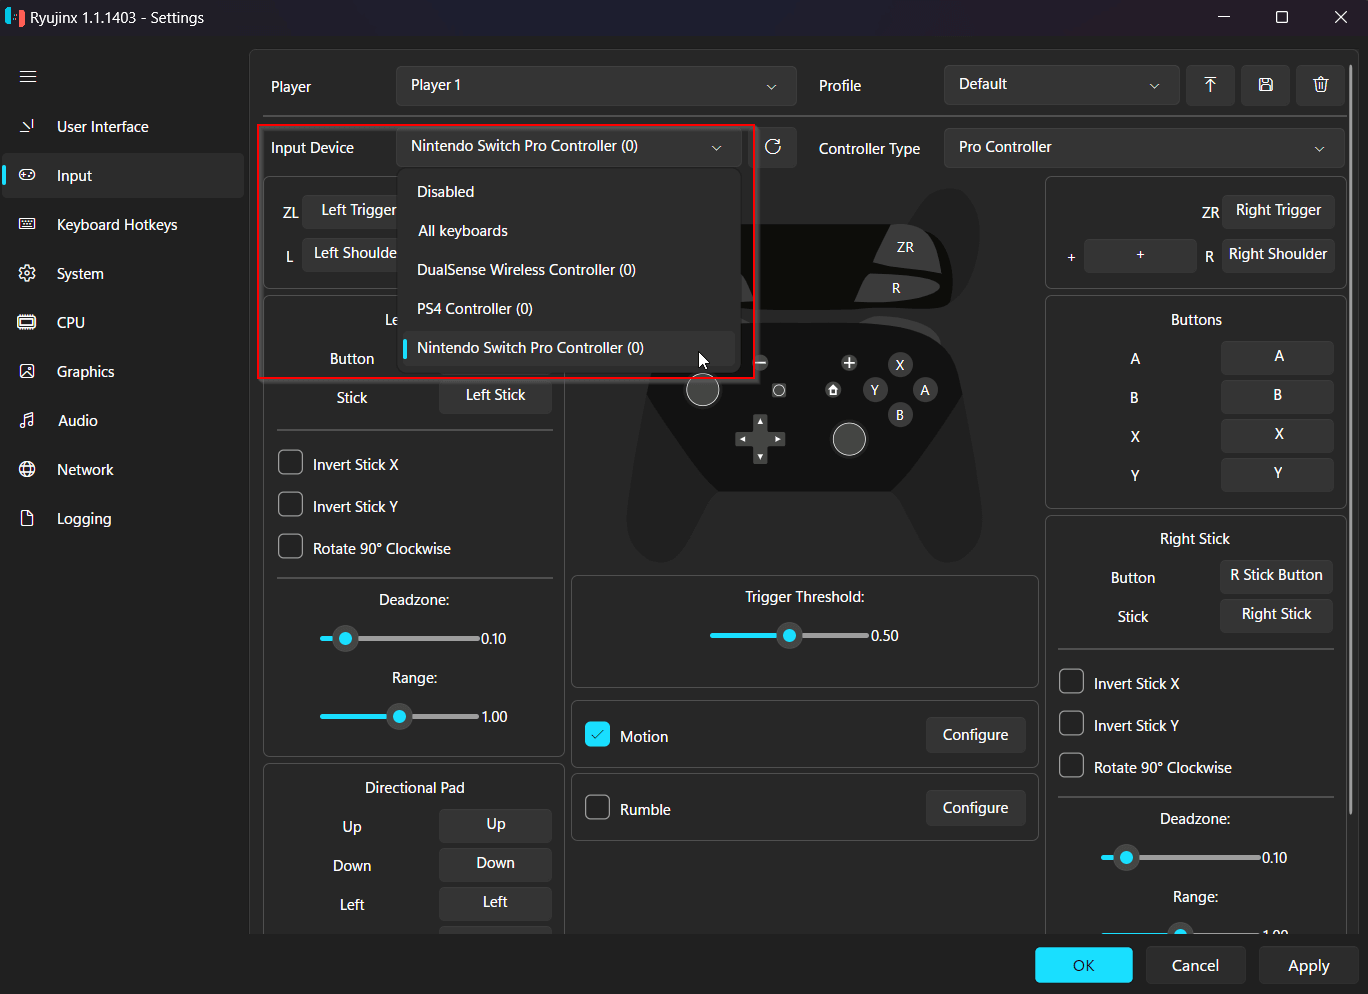
Ryujinx supports a variety of input devices, including:

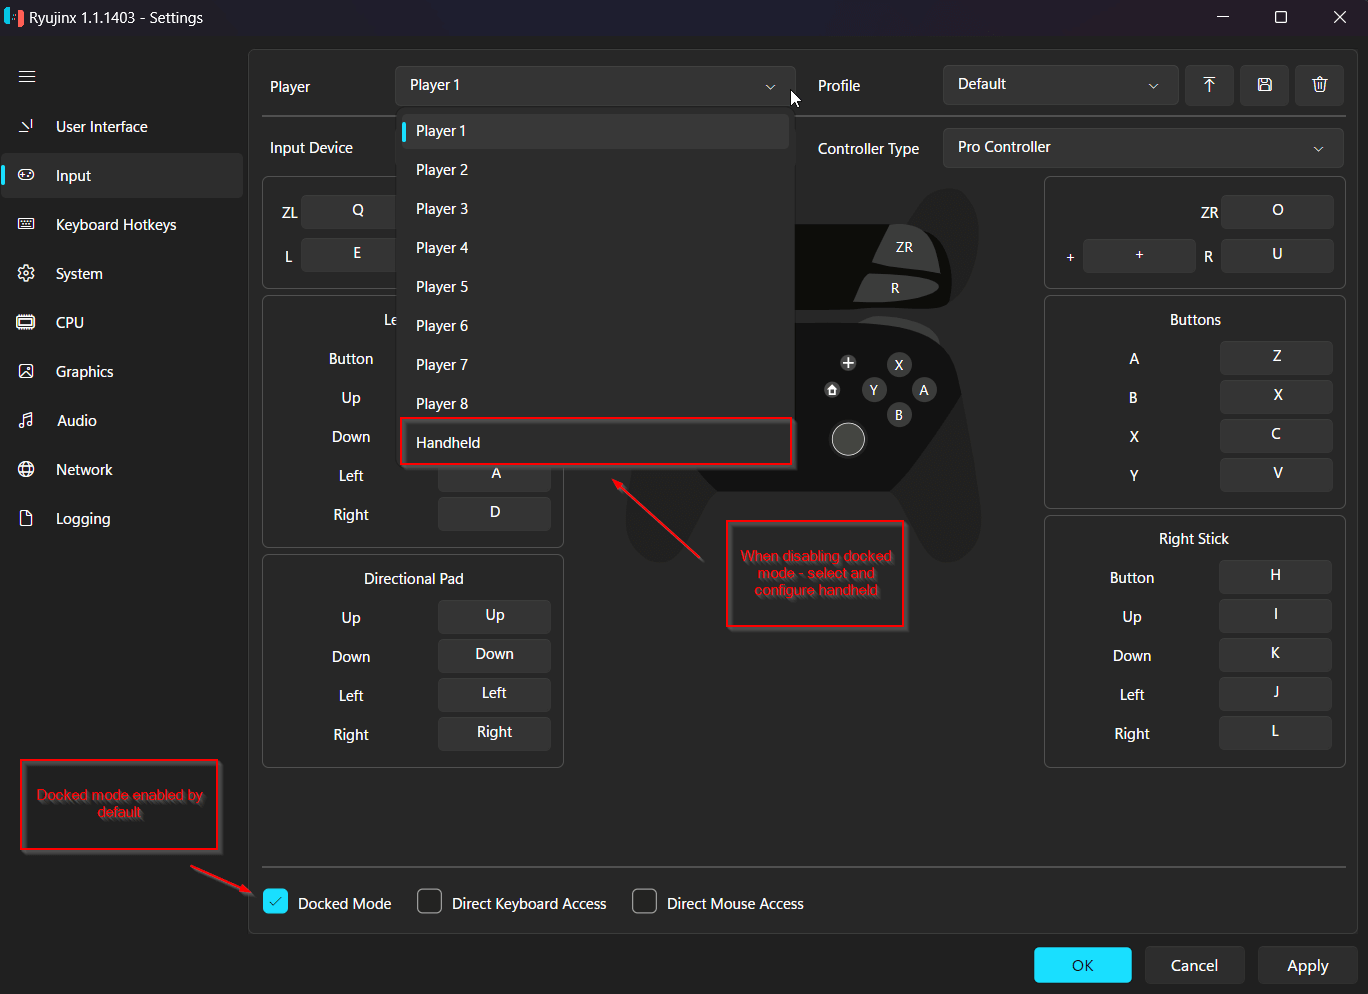
Ryujinx supports multiple profiles and controller slots for each user setup.
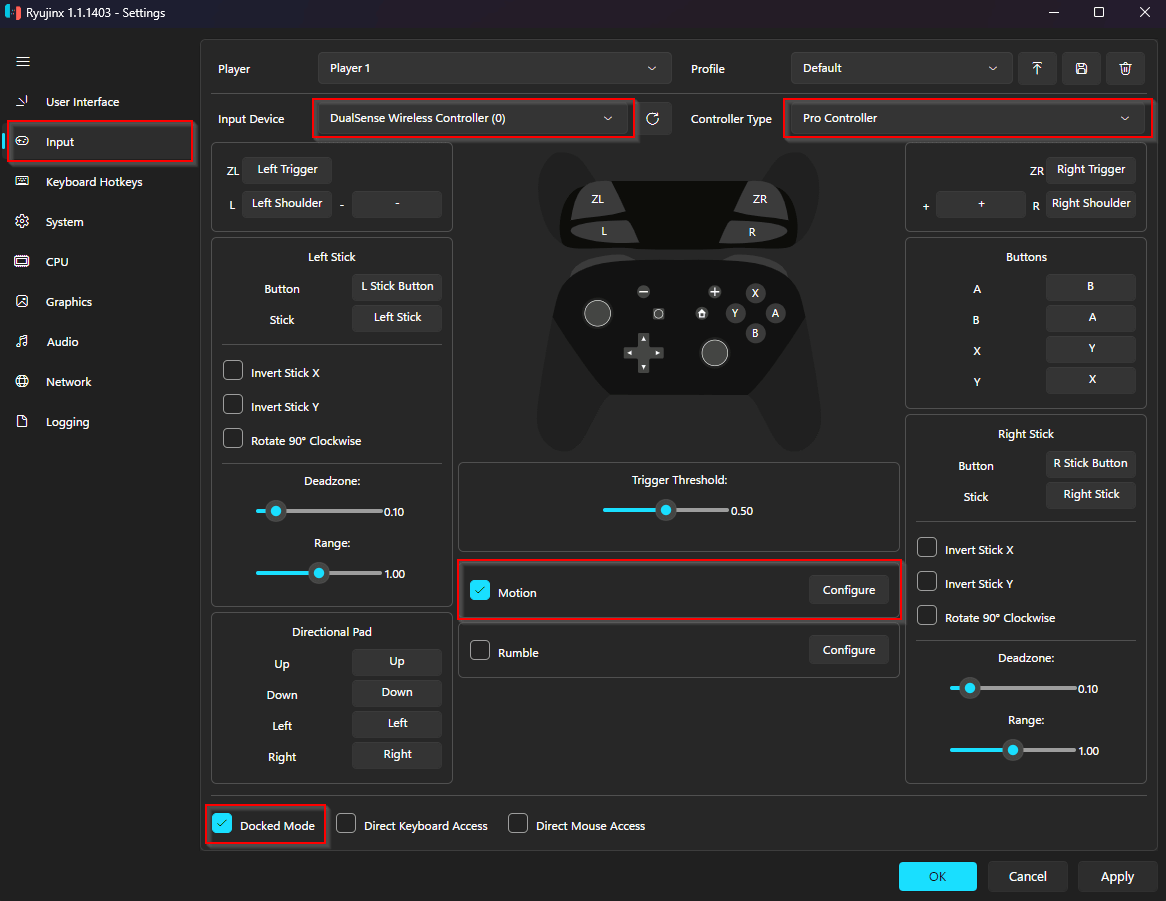
Ryujinx offers motion controls through:
You can use external software like BetterJoy, DS4Windows, or Steam Gyro to bridge motion data between your device and Ryujinx.
To enable motion controls in Ryujinx, follow the steps below:
https://ryujinx-emulator.com/wp-content/uploads/2024/11/ryujinx-settings-1.png

Ryujinx’s LDN functionality is available in the Network settings.

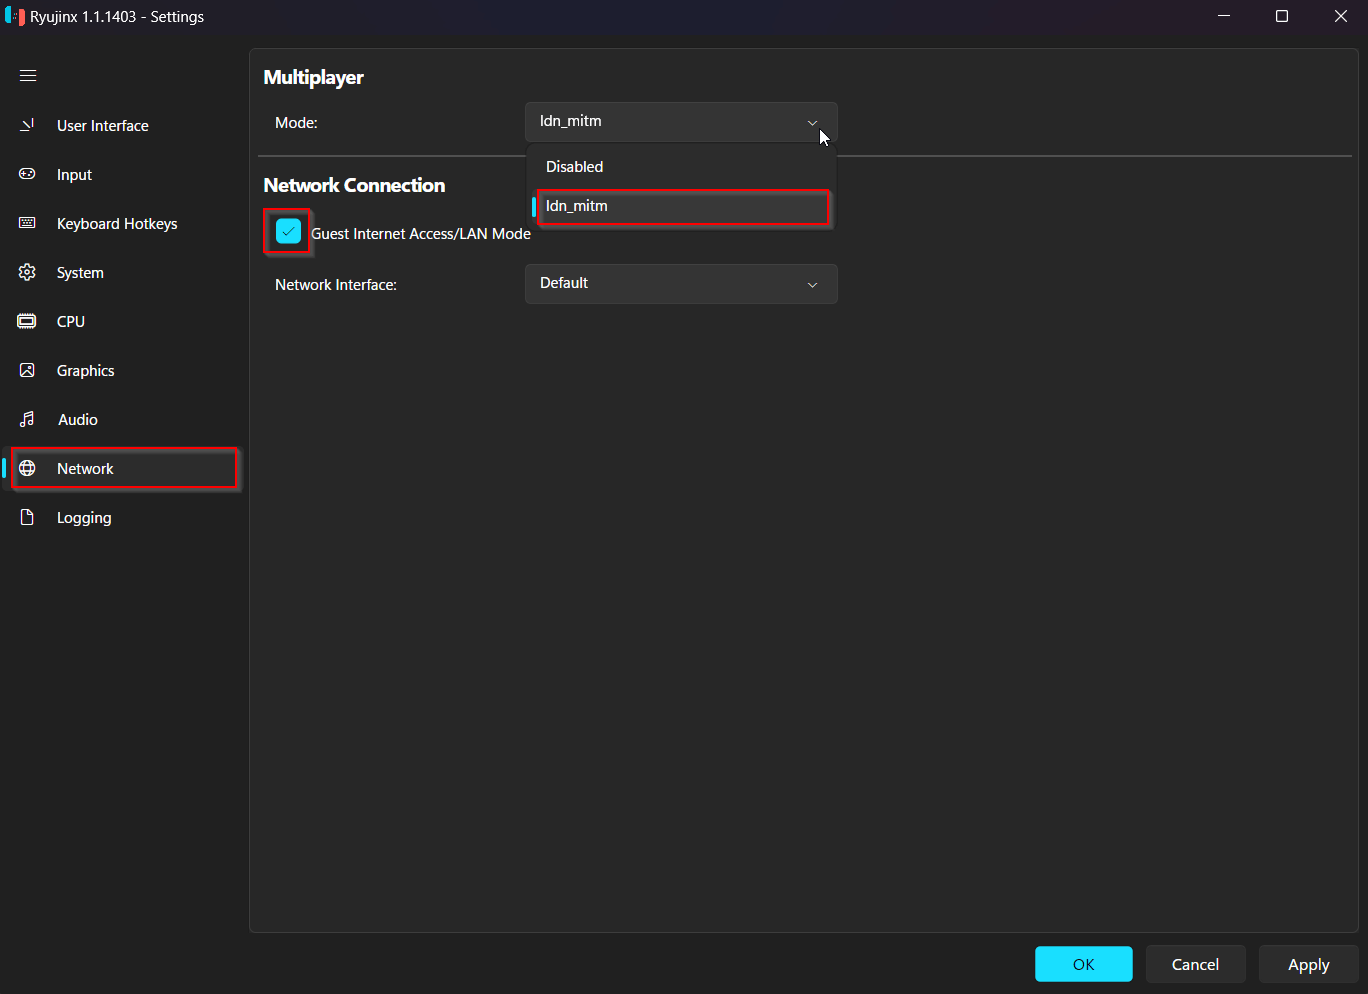
Click the Apply button to save your settings.
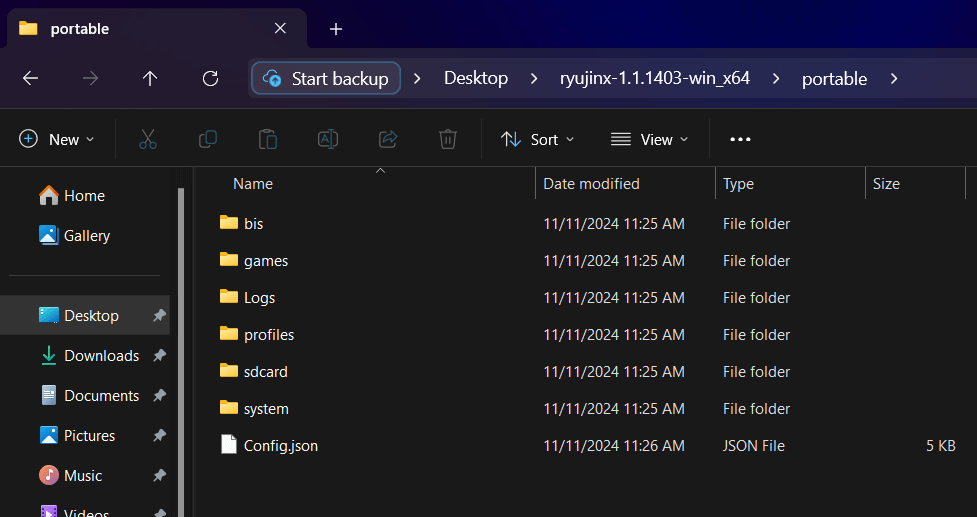
To enable Portable Mode, create a new folder inside your Ryujinx directory and name it “portable”. Once this folder is created, Ryujinx will automatically store all of its files there the next time you launch the emulator.
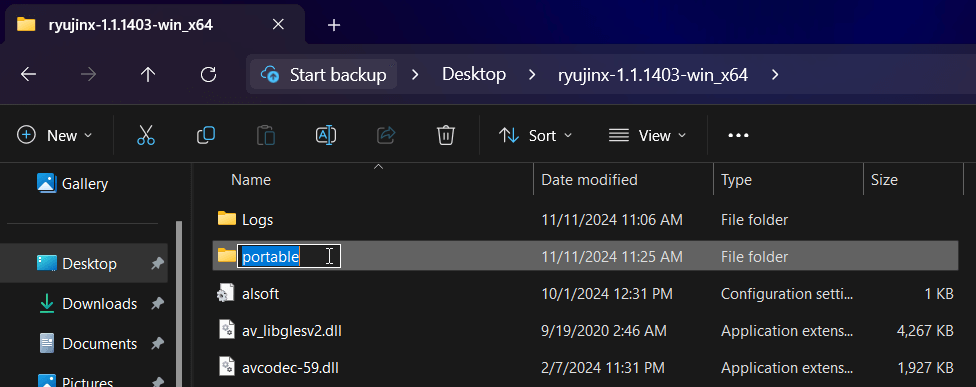
After launching, look at the Ryujinx console window. If the emulator is set to Portable Mode, you will see a confirmation message.
Once enabled, all necessary folders within the portable folder will be created, including saves, shader caches, configuration files, firmware, and keys.
You will need to manually copy your existing prod.keys and any installed firmware from your system directories to the new portable configuration. Similarly, if you want to keep your saved games or shader cache, copy them over as well.
Important Note: If you have previously used Ryujinx in standard mode, your files are saved in your system’s AppData directory. To continue using those files, you must manually transfer them to the portable folder.
PPTC is enabled by default in Ryujinx to ensure peak performance.
Important: To achieve the best results, launch the same game at least twice and progress to the title screen or beyond. On the third launch, performance gains from cached shaders will be noticeable and permanent.
If you want to disable PPTC:

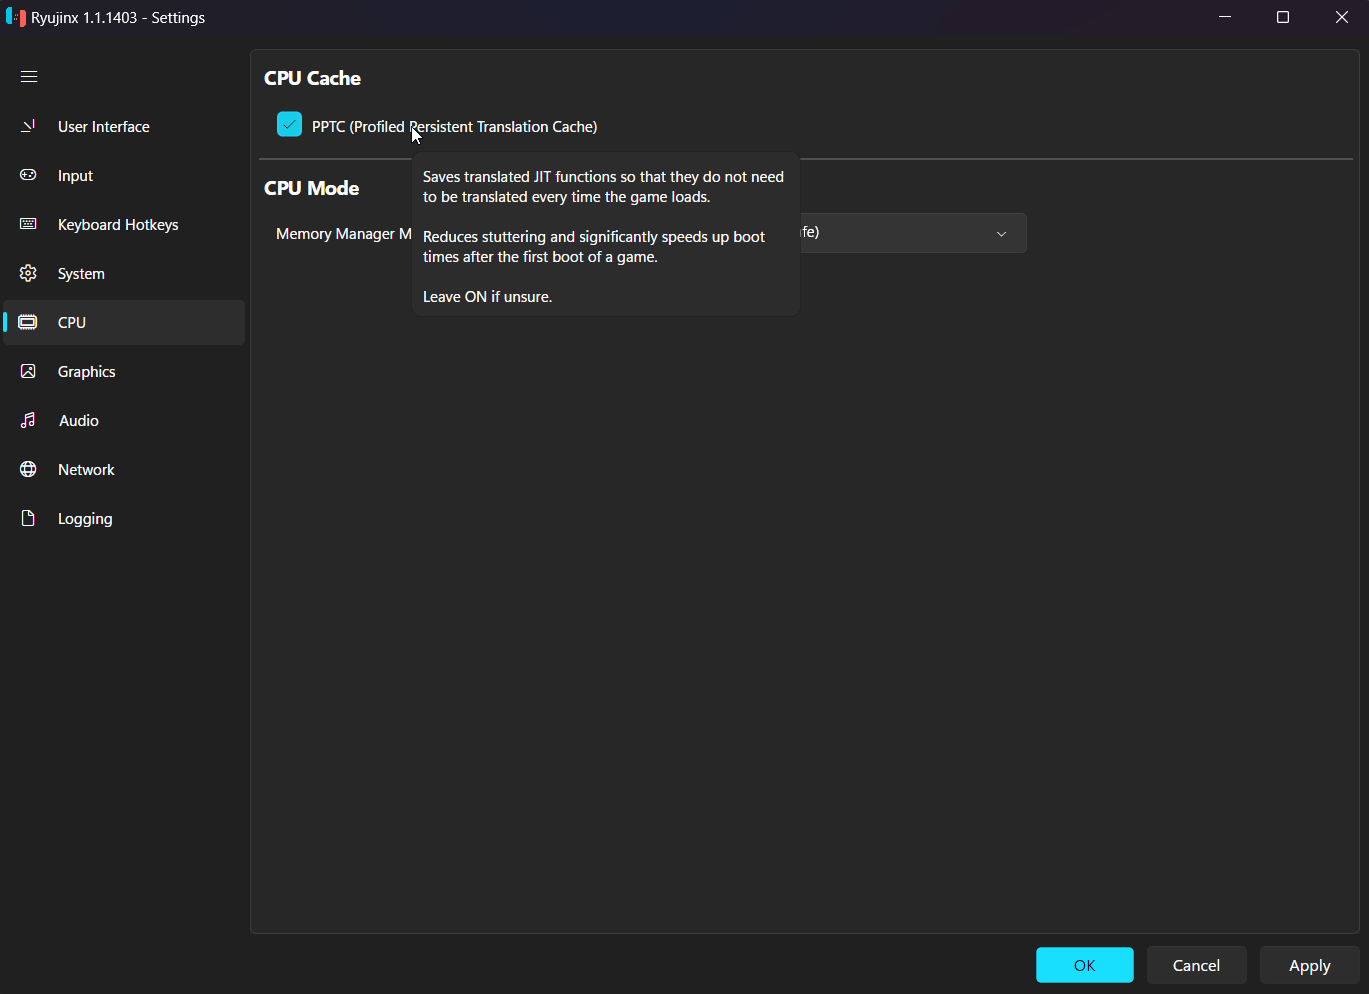
Disabling PPTC may result in stutters or longer loading times, particularly in shader-heavy games.
To legally obtain the prod.keys, you must extract them from a Nintendo Switch console that you own. This procedure calls for the use of specialized tools and the installation of custom firmware:
Alternatively, you can download the most recent prod.keys (v19.0.1) straight to your Switch if you already have one and use Ryujinx for legal, non-commercial purposes:
Download prod.keys (v19.0.1)
Once the keys have been obtained:
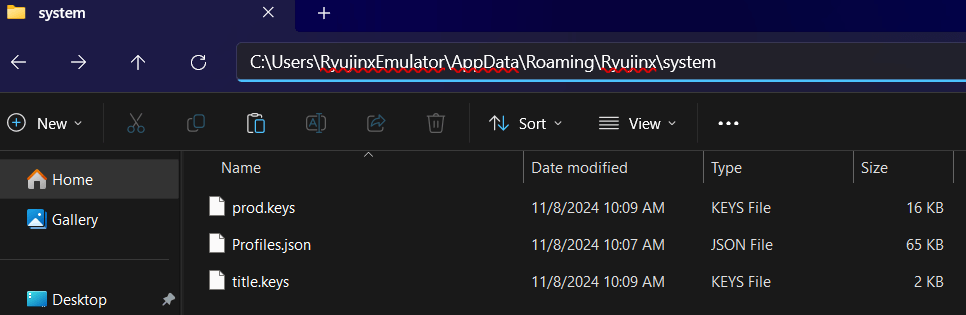
Once properly positioned, restart Ryujinx. The keys will be automatically detected and verified by the emulator.
By using or downloading the prod.keys file, you agree that:
Any unapproved use or distribution could be against regional intellectual property regulations.
If you own a Nintendo Switch console, you must be able to legally extract the firmware. Usually, homebrew tools and customized firmware are used for this:
Have you already obtained the firmware and are you making legitimate use of Ryujinx?
The most recent version can be downloaded here:
Download Nintendo Switch Firmware v19.0.1
After obtaining the firmware:

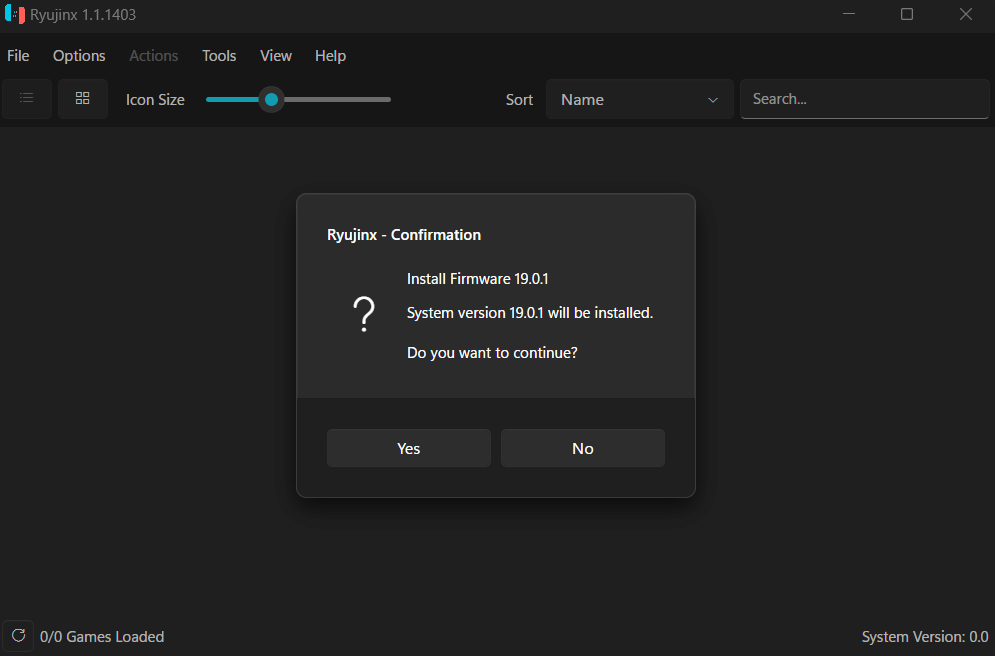
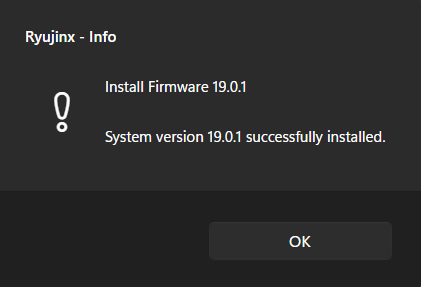
After choosing your firmware source, install the firmware by following the instructions. When finished, the system version ought to appear in the Ryujinx window’s lower right corner.
By using Ryujinx to download or install Nintendo Switch firmware, you attest to:
Unauthorized firmware file distribution or use may be against your region’s copyright laws.

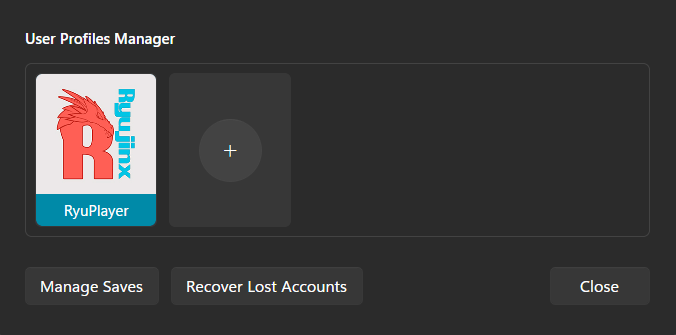
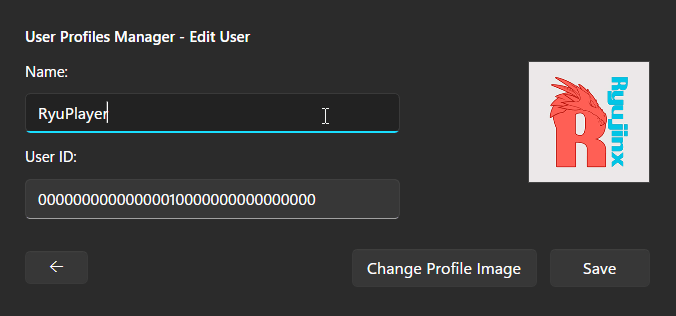
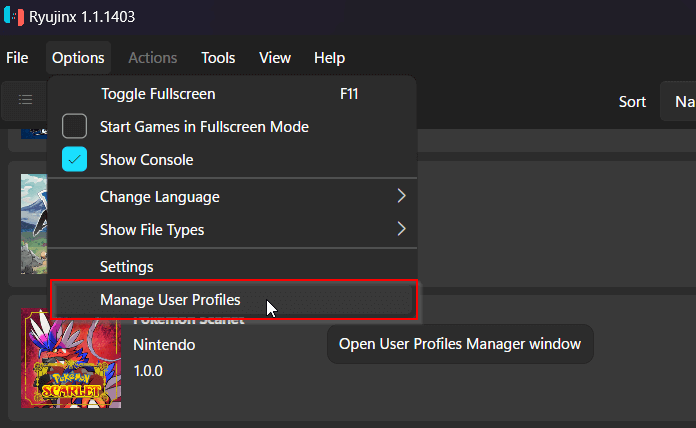
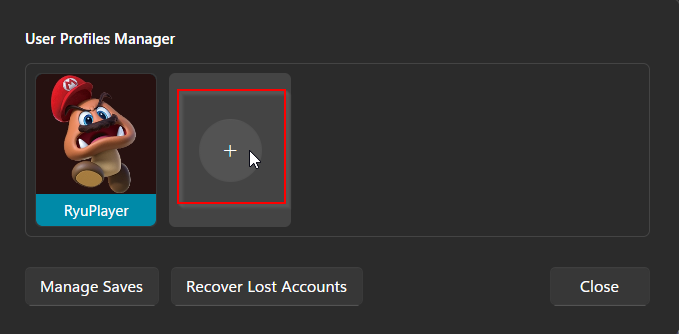
You will see the default profile, RyuPlayer. This is Ryujinx’s original user account, which cannot be deleted. However, it can be customized.
![]()
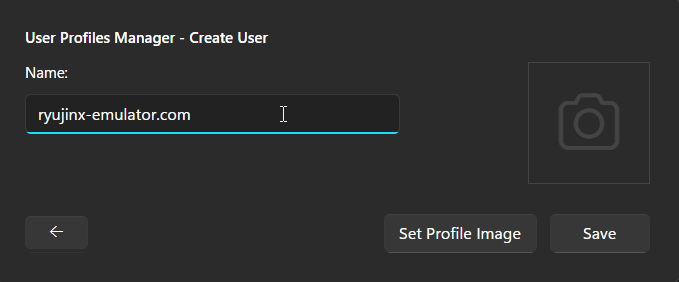
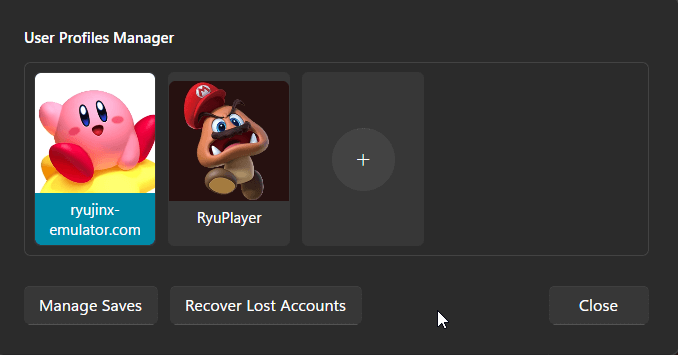
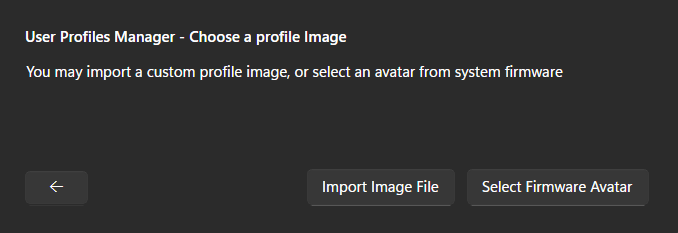
Your new profile is now available and will store its own game saves, settings, and progress, separate from other profiles.